| | | |
 Uploading .... Uploading ....There are situations when it is necessary to adjust the map location of a listing. Examples for such situations are:
- the geocoded location of the listing address is incorrect and so the map marker shows an incorrect location because of that (this does not happen very often, usually with new developments that have not yet been correctly surveyed and documented)
- the property is on a large lot and it is desired that the map marker shows a particular building, or the correct entrance to the property
- you do not want to enter a street number (perhaps to avoid prospective buyers to go directly to the property), but you do want the map to show a particular location that is advantageous for marketing the property
- you want to fine-adjust what Google Streetview shows (it is sometimes possible to adjust the map location so that the default Google street view shows the property)
Adjusting the map location is easy and you can do it in one of 2 ways:
1) use geographical coordinates that you obtained with a GPS device
2) visually, by repositioning the map marker on the preview map.
Follow these steps:
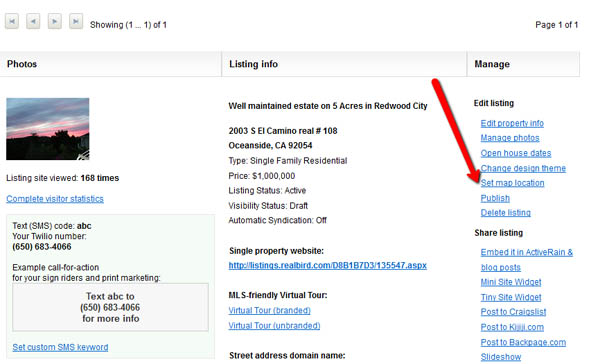
1. Log in to your RealBird account, then go to the Listing Marketing section. Find the listing that you wish to work on
2. On the right hand side of each listing are the management links. Click on the Set Map Location link for that listing:
2 Either
2.a enter the geographical coordinates in the appropriate fields and then click Save new location
2.b drag the map marker to the correct position and then click Save new location. Note that in this case it may be useful to zoom the map out first until you see the new target location, or, you can also switch the map to Satellite or Hybrid view if there are structures that ccould help you in positioning the marker:

|
|
|
| | | |
|