Home / Home Page / Facebook Real Estate Page Tools / Setting up a Facebook Fan Page with Homes For Sale Tab

Setting up a Facebook Fan Page with Homes For Sale Tab


Approximate time required: 5 minutes.
You can repeat these steps for as many of your Facebook Pages as you wish. The RealBird PRO membership includes unlimited deployment.

Steps:

  1. Add the Static IFrame Facebook Application to your Facebook Page
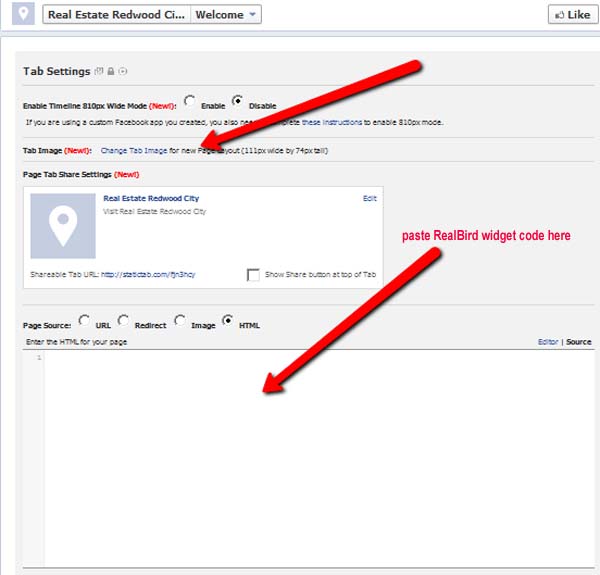
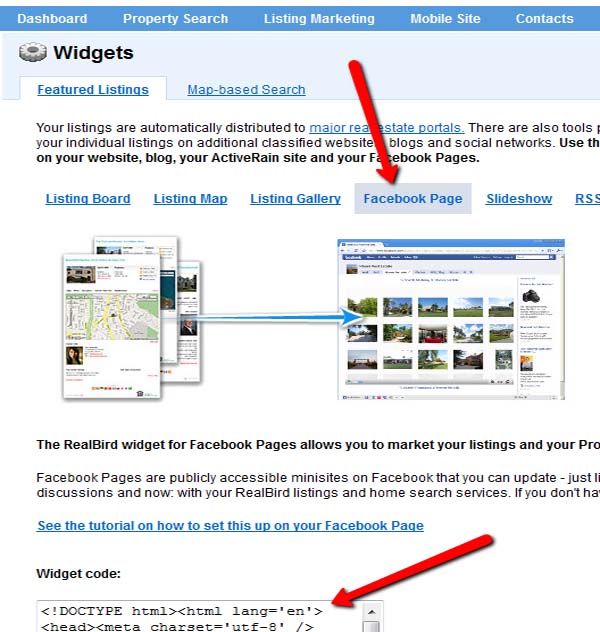
  2. Copy & Paste your RealBird mobile website code into the IFrame Facebook application
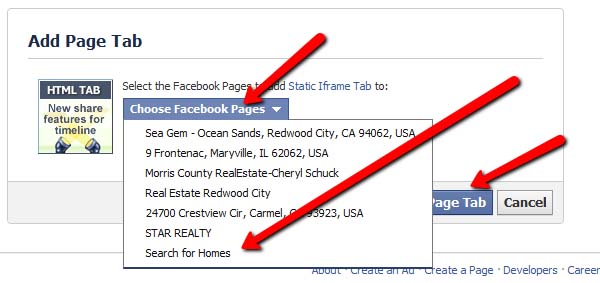
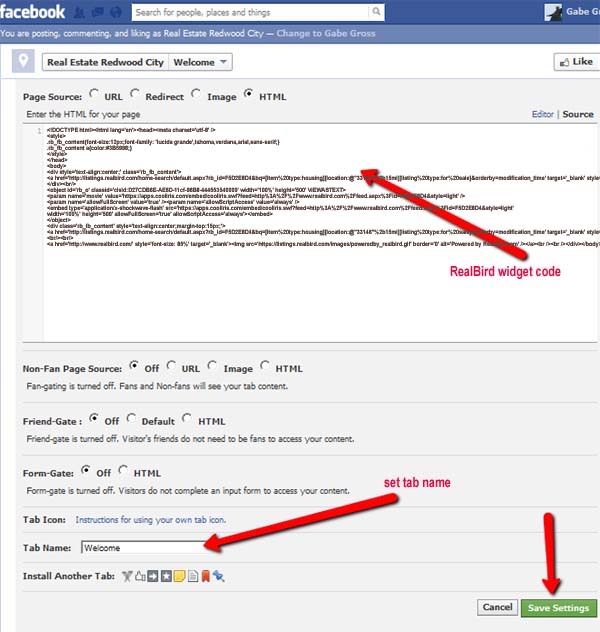
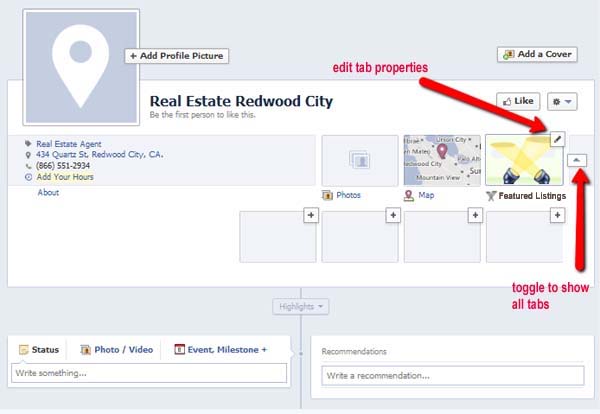
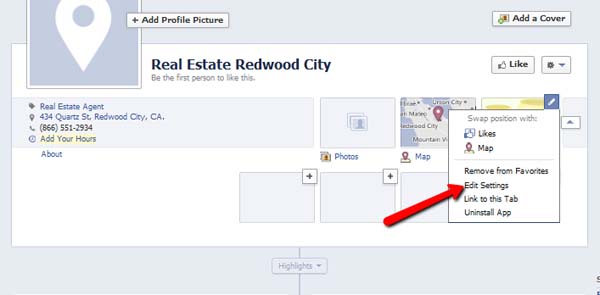
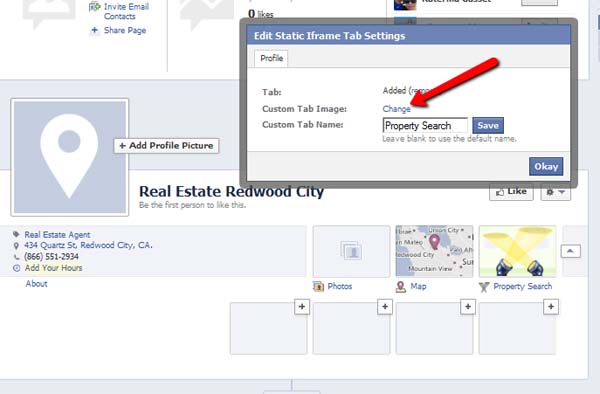
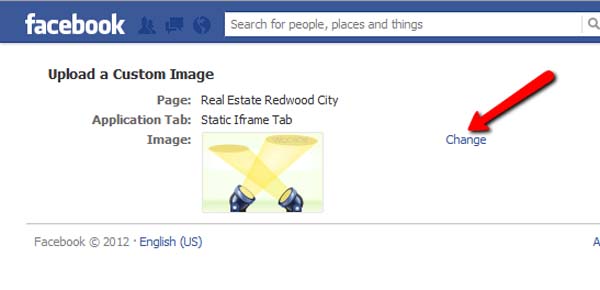
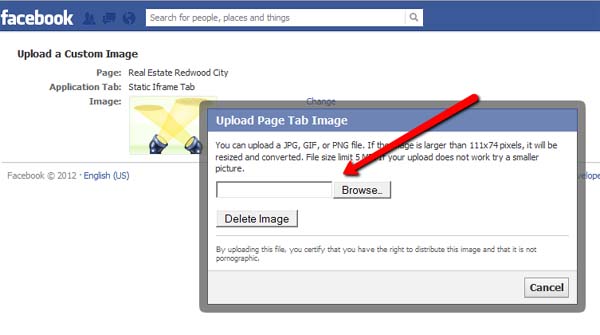
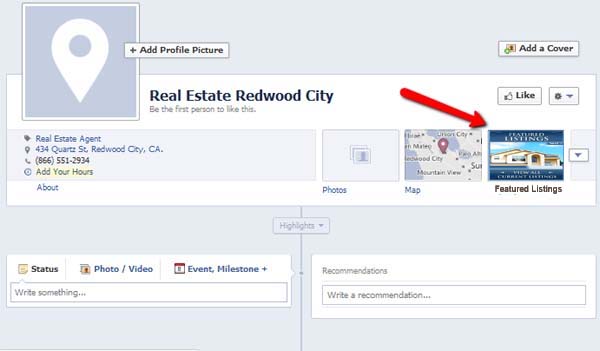
  3. Set the label of your Page Tab and drag it into the proper order and customize the Facebook icon

==========

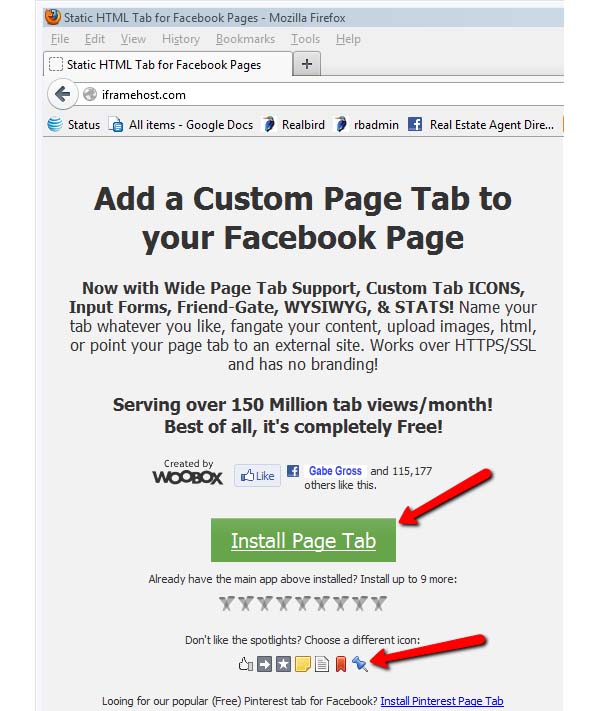
1.  Go to http://www.iframehost.com

2. Click on the "Install Page Tab" button to create a new Facebook tab.  If you are not logged in to your Facebook account you will be asked to log in. You can create a tab with the default icon, or select any of the other icons available.  You can also change the tab icon later, or use your own custom icon.


 3. On the next screen choose the page you wish to add the tab to and then click the  "Add Page Tab"  button:


4. The next screen allows you to set parameters of the tab, for example the tab image, and to add your widget code.  The figure below  shows  the top part of the screen.


 5. Go to your RealBird account to get your Featured Listing Inventory widget code - it is under "Widgets". 
 Note: you can use any of the widgets listed here, not just the Facebook page widget;  copy-paste the widget code  from here to the  Facebook code field (shown in the figure above) :


 Make sure the "Page Source" radio button is set to HTML then paste the code into the field shown above. If you want to add multiple  widgets, make sure you type in some explanatory text in between them"


 6. Scroll the window downwards where you can set the various other parameters for the tab (for details please read the Help Files for the  iframebox application) . You can change the name of the tab here (by default it says "Welcome").  You should use a short name such as  "Featured Listings".  Then, click the "Save Settings" button.

 7. View your page to make sure that the tab has been added and works.  (If you forgot how to access your page, just log in to your  Facebook account and then type in the address bar: http://www.facebook.com/pages/manage  which will list your pages.
 The tab will look something like shown below:


 8. You can edit the tab's properties and change the icon image by clicking the pen in the top right corner (see figure above) .  Note:  the  pen will only show if you toggle to "show all tabs".  To edit the tab properties click "Edit Settings"  in the menu:


 9.  To change the icon's image you will need to prepare a jpg image of 111x74 pixels.  Then click "Change" for the Custom Tab Image:


 then click "Change" for the Image:


 and upload your new jpg image from your hard drive:


    10. the result:


 RSS of this page